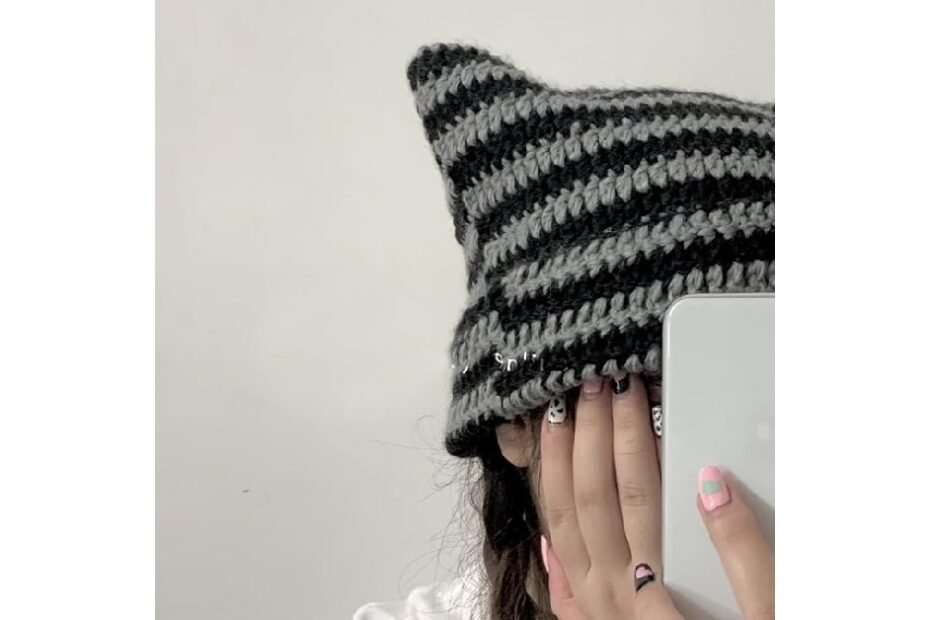
Ever thought about adding a touch of feline flair to your wardrobe? Whether you’re a crochet enthusiast or just starting out, crafting a crochet cat beanie is the perrrrr-fect project to show off your skills. It’s cute, quirky, and surprisingly easy to make—even for beginners.
Imagine cozying up with yarn and hooks, watching your creation come to life as adorable cat ears take shape. The best part? You can customize it with playful colors, fun embellishments, and just the right fit for any age.
So grab your yarn and crochet hook—this guide will take you through every step of making your very own crochet cat beanie that’s sure to turn heads and spark smiles!
Crochet Cat Beanies and Their Popularity
Crochet cat beanies have taken the DIY world by storm, blending style and personality into one adorable accessory. These charming hats are perfect for cat lovers, crafters, and anyone who enjoys playful fashion statements. Whether you’re making one as a gift, adding a fun twist to your wardrobe, or designing something unique for your pet, a crochet cat beanie offers endless possibilities.

Social media platforms and crafting communities have also played a big role in their popularity. From whimsical Instagram posts to vibrant Etsy shops, these beanies showcase creativity and charm. With countless patterns and styles available, they appeal to both beginners and experienced crocheters. Ready to make your own? Let’s dive into the essentials you’ll need!
Essential Materials and Tools for Your Crochet Cat Beanie
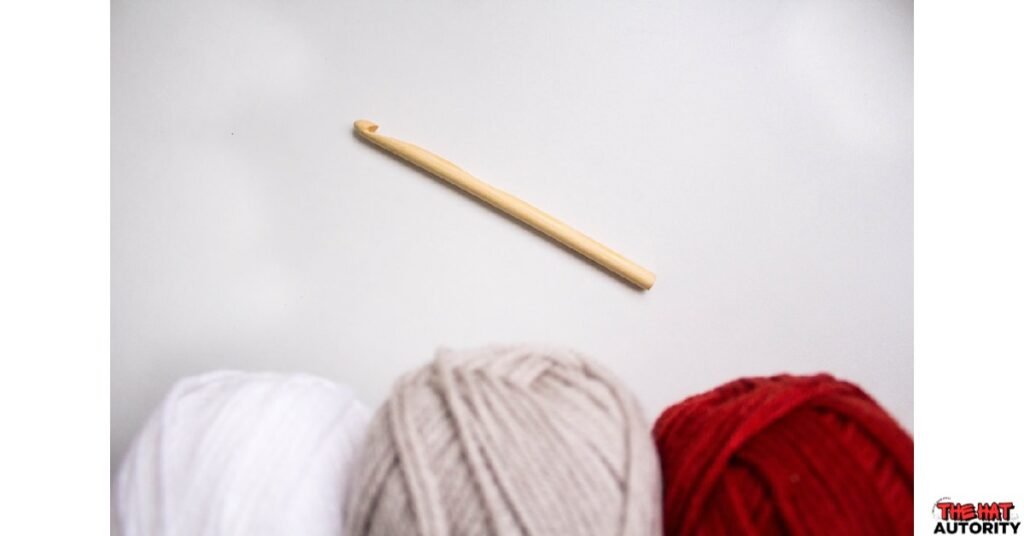
Before you start stitching, it’s important to gather all the tools and materials required for your crochet cat beanie. Here’s what you’ll need:
Materials:
- Yarn: Choose soft, worsted-weight yarn for comfort and durability. Popular options include acrylic or wool blends.
- Hook: A 5.0 mm or 6.0 mm crochet hook works best for beanies.
- Stitch markers: Useful for keeping track of rounds and ensuring symmetry.
- Scissors: Sharp scissors make cutting yarn easier.
- Yarn needle: For weaving in ends and sewing pieces together.
- Faux fur pom-poms (optional): Add playful embellishments like ears or decorative accents.

Extras to Consider:
- Measuring tape: Helps ensure the perfect fit.
- Buttons or beads: Adds charm and personal touches.
- Pattern guides: Keep printed or digital instructions handy for reference.
With your tools and materials ready, it’s time to jump into creating the base of your beanie.
Choosing the Right Yarn and Hook for Your Beanie Project
The success of your crochet cat beanie begins with choosing the right yarn and hook. These elements determine the texture, fit, and overall look of your creation.
Yarn Selection:
Opt for a soft, medium-weight yarn (Category 4 – Worsted) as it strikes the perfect balance between durability and flexibility. Acrylic yarns, like Lion Brand Heartland, are excellent for keeping the beanie lightweight and stretchable. If you prefer a more luxurious feel, alpaca or wool blends work beautifully for warmth and softness.
Best Colors for Cat-Themed Hats:
- Classic Cat: Black, gray, or white.
- Playful Cat: Bright pinks, purples, or multi-colored yarns.
- Whimsical Cat: Stripes or variegated yarns for added fun.
Hook Size Tips:
A 5.0 mm or 6.0 mm hook is most commonly used for beanies. Larger hooks create looser stitches, giving the hat a relaxed feel, while smaller hooks result in tighter stitches for a more structured design. Always check the yarn label for hook size recommendations.
Before starting, crochet a small test swatch to ensure the gauge matches the pattern. Adjust hook size as needed to maintain consistency throughout the project.
Step-by-Step Guide to Creating the Beanie Base
Let’s get hands-on! The base of your crochet cat beanie forms the foundation for adding ears and embellishments later.
Step 1: Create the Band or Brim
- Start with a slip knot and chain stitches until the band measures the circumference of the head (usually 20–22 inches for adults).
- Work rows of single crochet (SC) or half-double crochet (HDC) stitches in the back loops only. This technique creates a ribbed effect, adding stretch and texture.
- Slip-stitch the ends together to form a circle.
Step 2: Build the Body
- Crochet in the round, starting with double crochet (DC) or half-double crochet (HDC) stitches.
- Increase stitches evenly across rounds to widen the base until it covers the crown of the head.
- Continue working in rounds without increases to create the height of the beanie. Aim for about 8–9 inches tall.
Step 3: Shape the Top
Continue decreasing until the top closes. Use a yarn needle to weave the remaining yarn through the final stitches and pull tight to secure.
Begin decreasing stitches by skipping every 5–6 stitches in a round.

Once the base is complete, it’s time to add the finishing touches—those adorable cat ears!
How to Add Cat Ears for a Playful Look
No crochet cat beanie is complete without its signature ears! These fun and quirky additions transform your simple beanie into a standout piece.
Step 1: Make the Ears
- Start with a Magic Ring – Create a loop and work single crochet (SC) stitches into it. Tighten to close.
- Increase the Rounds – Add 2 SC stitches in each round to expand the size of the ear. Work 3–4 rounds, depending on how large you want the ears.
- Shape the Triangle – Continue building the triangle shape by alternating between increases and straight SC rows.
Step 2: Reinforce the Shape
For structure, use slightly tighter stitches like slip stitches (SL ST) around the edges. Alternatively, double-layer the ears by creating two identical pieces and sewing them together for added firmness.
Step 3: Attach the Ears
- Check for alignment and make adjustments if necessary before fastening the ends.
- Pin the ears onto the top sides of the beanie to ensure symmetry.
- Use a yarn needle and whip stitch the base of each ear securely to the hat.

These ears are customizable—pointier for a sleek cat look or rounded for a softer kitten vibe. You can even add small details, like stripes or tufts, to make them pop!
Tips for Customizing Colors and Patterns
One of the best parts about creating a crochet cat beanie is the ability to personalize it. Here’s how to make yours truly unique:
1. Play with Color Combinations
- Classic Look: Stick with solid colors like black, gray, or beige for a traditional cat-inspired style.
- Bold and Fun: Bright hues, ombre effects, or rainbow yarns add a playful twist.
- Two-Tone Ears: Use contrasting colors for the inner and outer parts of the ears to make them stand out.
2. Add Textures and Stripes
Incorporate textured stitches like front post double crochet (FPDC) and back post double crochet (BPDC) to create ribbing effects. Striped patterns or variegated yarn can mimic fur-like designs for added realism.
3. Embellishments and Features
- Whiskers and Nose: Embroider tiny whiskers and a nose using black yarn or embroidery thread.
- Pom-Poms: Attach pom-poms on top or as playful accents on the ears.
- Buttons or Beads: Sew on shiny buttons for cat eyes, giving it an expressive and adorable face.
4. Pet-Friendly Versions
Want to make one for your feline friend? Adjust the size and add an adjustable chin strap for comfort and fit. Use lightweight, washable yarn to ensure durability.
With these tips, your crochet cat beanie can reflect any personality, from elegant and sleek to quirky and fun!
Adding Fun Accessories: Pom-Poms, Buttons, and Embellishments
To make your crochet cat beanie truly unique, consider adding eye-catching accessories that bring it to life. These finishing touches can add personality, texture, and fun details to your design.
1. Pom-Poms for Flair
- Attach faux fur or yarn pom-poms to the tips of the cat ears or the top of the beanie for a playful vibe.
- Use removable snap-on pom-poms so you can easily switch styles based on your outfit or mood.
- Match the pom-pom color to the main yarn or go bold with contrasting shades.
2. Buttons for Character
- Sew on buttons to create eyes for a cat-face design. Mix and match button sizes for extra charm.
- Add decorative buttons along the brim or as accents near the ears for a polished look.
3. Embroidery Details
- Use embroidery thread to create whiskers, noses, and tiny smiles.
- Outline ear edges with colorful stitches to add extra definition and style.
4. Beads and Charms
- Incorporate beads along the brim or near the ears for a sparkly finish.
- Add tiny bell charms to mimic a cat collar for a whimsical touch.
Accessories make your crochet cat beanie customizable and ready to reflect your unique style!
Sizing and Adjustments for the Perfect Fit
Ensuring the right fit is crucial for comfort and style. Here’s how to size and adjust your crochet cat beanie effectively:

1. Measure the Head Circumference
- Use a measuring tape around the head where the beanie will sit.
- Standard adult sizes are around 20–22 inches, but you can adjust as needed.
2. Adjust the Starting Chain
- For larger sizes, increase the initial chain length until it matches the desired circumference.
- For smaller sizes, reduce the chain length to fit toddlers, children, or pets.
3. Customize the Height
- To create a slouchy beanie, add more rows to increase the height.
- For a snug fit, stop adding rows once it reaches about 8 inches tall.
4. Test the Stretch
- Crochet stitches naturally stretch, so aim for a slightly tighter fit to allow room for flexibility.
- Fold up the brim or adjust the number of stitches in the ribbed band to fine-tune the look.
5. Pet-Friendly Adjustments
- Make smaller versions for cats or dogs by halving the dimensions and adding adjustable straps.
- Use lightweight, washable yarn for easy maintenance.
Taking the time to measure and adjust ensures your crochet cat beanie fits perfectly and stays comfortable for everyday wear!
Care Instructions to Keep Your Crochet Cat Beanie Looking Fresh
Proper care ensures your crochet cat beanie stays clean, soft, and vibrant for years. Follow these simple tips to preserve your handcrafted creation:
1. Washing Guidelines
- Hand Wash Recommended: Gently soak the beanie in cold or lukewarm water with mild detergent.
- Machine Wash Option: Use a mesh laundry bag and set the machine to a delicate or gentle cycle with cold water.
- Avoid bleach and harsh chemicals that can damage fibers.
2. Drying Tips
- Air Dry Flat: Lay the beanie flat on a clean towel to maintain its shape. Avoid hanging it, as this may stretch the stitches.
- No Heat Drying: Skip the dryer to prevent shrinking or warping.
3. Storage Advice
- Store in a dry, cool place away from direct sunlight to prevent fading.
- Fold neatly or place it in a fabric storage bag to avoid snagging or stretching.
4. Handling Embellishments
- Remove detachable accessories like pom-poms before washing.
- Spot clean embroidered details or delicate buttons with a damp cloth.
By following these care instructions, your crochet cat beanie will continue looking as charming as the day you made it!
Troubleshooting Common Crochet Mistakes
Even experienced crocheters run into challenges, but don’t worry—here’s how to fix the most common issues:
| Issue | Problem | Solution |
|---|---|---|
| Uneven Stitches | Inconsistent tension causing uneven rows. | Slow down and check stitch placement frequently. Practice swatches before starting the main project. |
| Beanie Too Tight or Too Loose | The fit doesn’t match the head size. | Adjust the number of chains in the base or add/remove rows to modify the circumference. |
| Gaps in Seams or Ears | Loose stitches when attaching pieces. | Use a tighter whip stitch or go over the seams twice for added strength. |
| Ears Flop Instead of Standing Up | Ears lack structure. | Reinforce ears by double-layering or using stiffer stitches like slip stitches along the edges. |
| Yarn Splitting While Crocheting | Yarn separates into strands, making it hard to work with. | Switch to a smoother yarn or use a hook with a rounded head to reduce splitting. |
With these solutions, you’ll have everything you need to troubleshoot problems and finish your crochet cat beanie successfully!
Conclusion
Crafting your very own crochet cat beanie is more than just a fun DIY project—it’s an opportunity to unleash your creativity and make something stylish and unique. Whether you’re adding playful cat ears, experimenting with colors and patterns, or customizing it with pom-poms and buttons, the possibilities are endless.
We’ve covered everything you need to know—from selecting the right materials and tools to adding those charming finishing touches. With a little patience and practice, you can create a beanie that’s as cute as it is cozy. Plus, it makes for the perfect handmade gift for cat lovers of all ages—or even your own furry friend!
Now it’s your turn—grab your crochet hook, pick out your favorite yarn, and let your imagination run wild. Don’t forget to share your finished crochet cat beanie creations in the comments below or tag us on social media. We’d love to see your designs!
Happy crocheting!
FAQs
-
What materials do I need to make a crochet cat beanie?
You will need yarn (preferably worsted-weight), a crochet hook (5.0 mm or 6.0 mm), scissors, a yarn needle, and optional embellishments like pom-poms or buttons. -
How long does it take to crochet a cat beanie?
For beginners, it may take 3–5 hours, while experienced crocheters can complete it in 2–3 hours. -
Can I customize the cat beanie with different colors?
Absolutely! You can mix and match yarn colors, add stripes, or use variegated yarn for a unique look. -
How do I make the cat ears stand up?
To make the ears stand up, reinforce them with tighter stitches or double-layer the fabric for added stiffness. -
Is the crochet cat beanie suitable for pets?
Yes! You can scale down the pattern for pets and add adjustable straps for a comfortable fit.